Showing posts with label tutorial. Show all posts

Thursday, May 26, 2016

Fabric Boxes

Check out these cute little fabric boxes.  Aren't they adorable? They are like chips though, you can not make just one.  You will start plotting what you will do with each of them and just keep making them. What joy!

If you want to make this go to this site, Seaside Stitches for the pattern, its free.  The instructions are very clear.

Sunday, November 23, 2014

X's and O's Quilt

Here is the X's and O's quilt.  Another one to make real soon since I have lots of 2 1/2 squares to use up.

Then again, Bonnie's Quilt is coming soon and I think I am going to do it!  Click here to Quiltville's Quips and Snips to see the Mystery Quilt.  The first set of instructions will be the day after Thanksgiving. 


Thursday, July 24, 2014

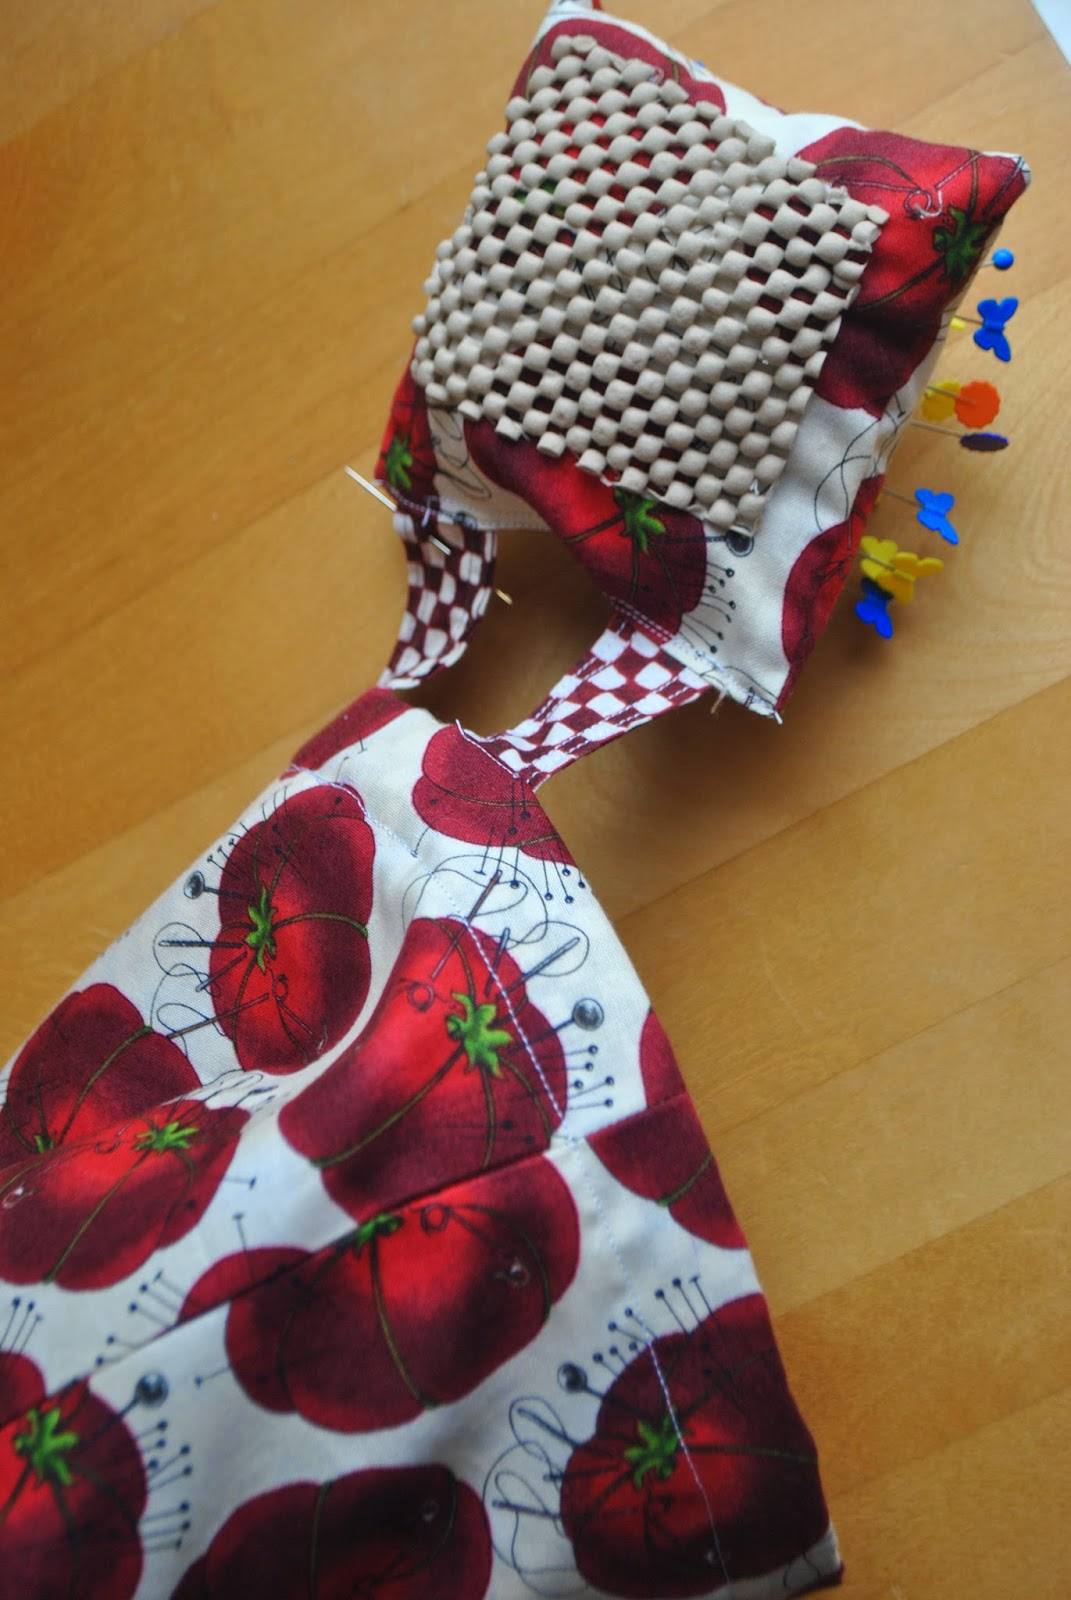
Pins and Trimmins Bag


I have always wanted one of these but just never took the time to make it.  This past Spring (yes, I am a little behind here), I designed a bag for the ladies to do at our guild retreat.  I will post the tutorial next post.
Don't you love this fabric.  I have a thing for notion type fabric.  I think it is incredibly cute and perfect for projects like this.  Its been in my stash for about a year and a half.  Whew, that time went fast.
This is not on the pattern.  One of the ladies suggesting putting a little rubberized backing on it.  I just hand sewed it on
Then I wanted a match set because I never have matched sets.  Like you know those ladies that have matching bags and suitcases.  Not me.  Just a conglomeration of whateve was on sale.  Ha!  But thats okay I am a thrifty kind of girl after all.  But this was a little treat for myself along with some functionality. 

I just measure my machine, figured a rectangular size, added a half an inch for each side. I added some batting as well.  I sewed my sides and one end with right sides together and then turned it inside out.  I added Velcro and the straps.  Just turn in the final side and sew closed.

Yes, below there is a little bit of a mess.  My sewing room is in a constant process of clean and then messy.

Tuesday, May 14, 2013

Wall Hanging Ribbon Bulletin Board


I have been finishing some projects that have been nagging at me for a while.  Some years of nagging, some months of nagging.  Even though I have been totally scattered and distracted I somehow managed to get two loads of laundry done, finish this wall poster board type thing, a door hanger which I will show you next time and a block for the 2012 Craftsy Block of the Month.  Dang.

And yes I know it really isn't terribly straight.  It doesn't matter.  When it is hung and she has all kids of pictures and cards and to dads tucked in it, who will be the wiser?

Some things are worth trying to achieve perfection.  This project was more of a "get 'er done".

How did I do it?

I used two cardboard fabric holding bolts that a lot of fabric stores will be happy to give you if you ask nicely.

Next I glued them together and on to a yard stick that was broken down into pieces.  The yeard sticks were put on vertically to give it stability.

Then I wrapped it in fabric and glued it down to the cardboard.

Then I stapled the ribbon in working in a cross-weave type pattern. I staple gunned at the point where the ribbons crossed.

I also stapled the fabric down in the back along with the extra lngth of ribbon.

I decorated the ribbon "joints" with paper flowers.

Just a funny FYI this ribbon was given to me by my Mother who had received from her mother.  I had been saving it for the perfect project.  Silly me.  I used it for this.  I am sure her great grand daughter will love it. (probably from the 1960s).

Wednesday, February 22, 2012

Drawstring Bags and Tutorials

I saw these at In Color Order but I have been wanting to make one since I saw this one here ( a free tote tutorial, among others, at Pillow and Maxfield).  They are super fun and easy to make and whip up in no time.  They make a great lunch bag that you can just throw in the laundry as needed.  Go here for In Color Orders instructions on how to make them.

Friday, May 28, 2010

Recovering a Chair

I have this table that was handed down to me.  I needed to reupholster it so I could sell it.  Who wants to buy a table with cruddy chairs?  It would turn me off.   Since I already had some fabric that I could use for the chairs I decided to go ahead and recover them.

Here's how to recover a chair step by step.  This is the quick and easy way, covering the old cushiona nd material and all.  If you really want to do this perfectly, I highly recommend stripping the old material off and the old cushion off before recovering.  You want all fresh materials.

Materials needed:

staple gun
scissors
fabric tape (duct tape would work fine)

Step one:  Remove the chair pads from the frame of the chairs. 

Step two:  Cut fabric to the size of the pad, leaving ample working material to go over sides.  You better off to have too much fabric rather than not enough.


Step three: Starting with the front of the chair fold over fabric.  Make sure you line up the design so the cushion doesnt look crooked when it is completed.  If this is your first time, I recommend a solid color or print that doesn't have any lines. Staple the front going from one end to the other, do not staple to the corner.  Leave about an inch and half.
Step four:  Folding the corners can be a bit challenging.  I recommend playing with it a bit to get the best angle.  You can taper around the corner.  I kind of work it like an envelope, folding in one side but then I taper the overlapping fold around it.

Step five: Staple the sides all the way to the backa nd leave the one and half inch space for the corners there as well.  As you staple the sides, make sure you pull the fabric taut so it is does not have gaps and puckers.

Step six:  Finally the back. turn the seat over to assess the look.  If you see any gaps you can pull the fabric in the back to work it out. Make sure when you are completing the back that you are stretching the material so that the finished project is tightly on the chair pad.

Step seven: Trim any excess material off and if you want a more finished product tape down the edges of the material onto the chair pad.  Place back on the chair frames and screw into place.

Wednesday, April 21, 2010

A Pillow Case Tutorial

I decided to teach my seven year old the basic fundamentals of sewing. I thought a pillow case would be the best palce to start.  While certain parts of the process were less than exciting to her, she was absolutely thrilled with her new pillow case and has been quite attached to it ever since.

I hope the following provides you with a clear tutorial on how to make a bordered pillow case.

What you will need to make a standard size pillow case:

These are all based on fabric that is 42-45 inches wide.

3/4 to a yard of fabric; this will be the main color of the case
11 inches to a 1/3 of a yard of fabric; this will be your border fabric
2 to 3 inches of fabric; this will be your trim
coordinating thread

The reason why I give a range is because I like to get a little mroe than I need to accomodate mistakes but also to use for other projects. If you want to get the bare minimum then go with the lower amount.


Cut your trim fabric to a piece that is 2 inches x the width of your fabric. Iron and then fold in half lengthwise and iron again.
Cut your border (mine is red here) 11 inches x the width of your fabric.
Cut your main fabric (the yellow lady bug one) 27 inches x the width of your fabric. Line them up along the width. Pin in place and sew a 1/4 inch seam, making sure to catch all the layers in the seam.  Incidentally, all seams are 1/4 inch unless noted otherwise.

Open up your seam and press.
Fold in right sides together, making sure to line up the trim and border.  Pin in place and sew around.
Zig zag the inner edges to reduce fraying.
Now turn in a 1/4 inch fold on the border and press down.
Turn the fold into the inside covering the raw edge within the pillow case.  Pin on outside (right side) of pillow case.  Top stitch the fabric in place.

Top stitch again a 1/4 inch into the main fabric.  Press and voila, a new pillow case for sweet little heads.